|
01st October 2021
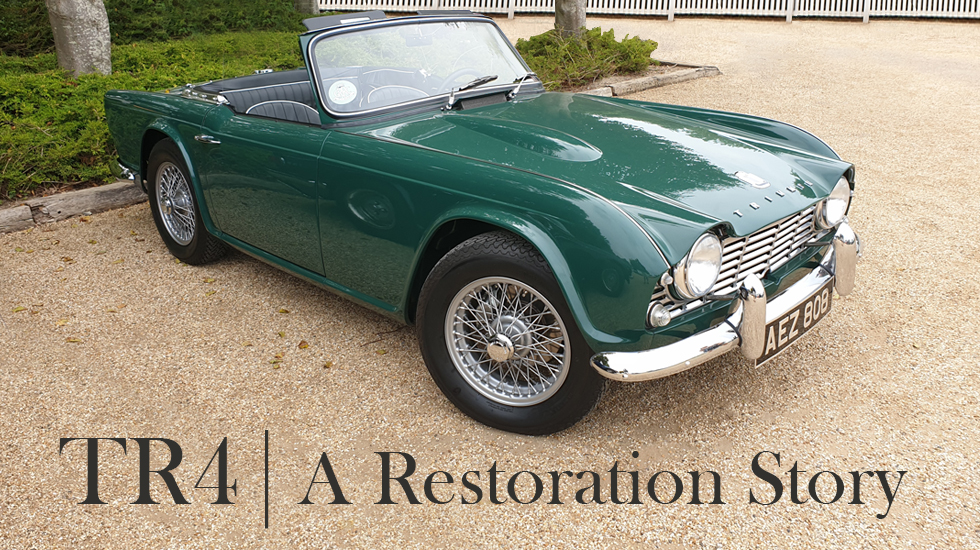
TR4 | A Restoration Story, by Bob Smyllie.
Foreword
Having used many parts from Moss during the restoration of his TR4, Bob got in touch asking if we'd be interested in his account of the process, and of course, we were very much interested! Bob's mission of 'bringing an otherwise condemned car back to life' is an honourable one, and as a first-time restorer, a bold one too! As Bob demonstrates, a lot can be achieved with forethought, organisation, determination, and patience.
If you have a story to share, whether it's a restoration, an epic drive or a classic memory, please do get in touch: [email protected]
Over to Bob...
Before I embarked on this restoration project, I spent a lot of time researching articles written by classic car owners who had taken time out to tell their story. I found this invaluable and applied much of their advice when planning my own project. Hopefully my account may help and even inspire anyone who is considering classic car ownership and restoration!
Why take on such a project?
I have been fortunate enough to enjoy ‘a week-end toy’ in addition to my daily drive. In 2012 a career change triggered the decision to work for myself. Without the safetynet of a salary it made sense to rearrange the stable resulting in the sale of my Caterham 7 and downsizing my daily drive to something less expensive.
I did however want something to occupy the vacant spot in the garage but could not afford anything extravagant. I considered classic car ownership (being an individual of a certain age) and wondered whether or not I could complete a restoration. The thought of bringing an otherwise condemned car back to life was the vision. There are many examples of stalled projects up for sale which is something that helped me to maintain focus and momentum throughout the project. I visualised the finished article and that sense of personal achievement which really helped on some of the darker days.
What experience did I have?
My day job is Management Consultancy specialising in systems and business transformation, nothing to do with cars or engineering. I hoped that my project management and organisational experience should come in handy with planning and budgeting. From a young age I have tinkered with my own cars (mainly through financial necessity), so I was reasonably confident with basic spannering and the concepts of the systems of a car but knew my limitations. My aim was to do as much as possible myself, using specialist services only where needed. Suffice to say I was a virgin restorer!
Choosing the right car?
I took my time deciding what car I should target in my search. I considered the likely cost to purchase, general availability of parts, and of course the car would need to be something that I could live with and enjoy (assuming that I actually managed to complete it!) Eventually I settled on a Triumph TR4 although this was a leap of faith as I had never driven or even sat in one. Decision made I started to look at sources and eventually found a complete example that had just been imported from California by RL Johnson who always seems to have an interesting and eclectic selection of British sportscars from the USA.
I would not recommend my next actions, after looking at a couple of photos and an email conversation with Rob Johnson we agreed on a price and the deal was done. The car was a barn find that had been sitting in California for 37 years, non-running, mostly complete but would require a complete restoration - I had just purchased my project car ‘unseen’!
Getting ready for the new arrival
This was a period of intense research and a degree of nail biting waiting for the TR to arrive. I joined the TR-Register (TR Owners club) who have excellent technical forums and research articles. I was made very welcome on the forum and found existing members to be incredibly helpful and knowledgeable whilst also having a healthy sense of humour. Moss stock a wide range of books & manuals for the TR2-4A of which I purchased two invaluable books, ‘How to restore Triumph TR2 – TR4A’ by Roger Williams and the official Triumph TR4/4A Workshop Manual. These three sources of technical advice and guidance were invaluable during the project. I also took the opportunity to check the Engine, Gearbox, Body and Commission numbers and obtain a Heritage certificate which confirmed that it was a matching numbers car – Phew!
Given my project management background I decided to build a restoration plan outlining what needed to be done, when it should be done by and initial cost estimates. All sounds very organised, however I very quickly realised that the only aspect of my plan that I had any control of was the ‘What needs to be done’.
Next on my agenda was the intended storage/workplace. I cleared out the garage and sheds to create slightly more room to work than there was before. One thing that I had read was that you should not underestimate how much space you need to store a car when it is in pieces.
Finally, I arranged insurance for the car. Despite the fact that it was a rusty relic that would not be running or driving for some considerable time I thought it would be prudent to arrange for some form of cover. After talking to several firms specialising in classic vehicles I opted for a ‘laid up’ policy with Hagerty. They are a US company now operating over here, what impressed me was that they are ‘Car guys’ and love to talk about classic cars. The cost was very low, and the policy would allow me to amend the valuation of the car as work progressed until the project was complete.
The new arrival
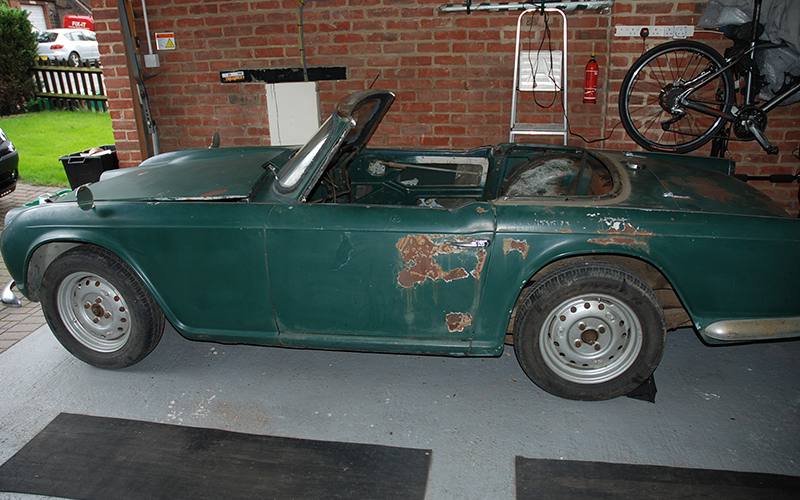
The car finally arrives on the back of a flatbed, we offload it and roll it into its new home. Initial inspection brings relief as the chassis is straight and only has a mild case of surface rust on the front crossmember – bullet dodged!
Credit: Photo by Bob Smyllie
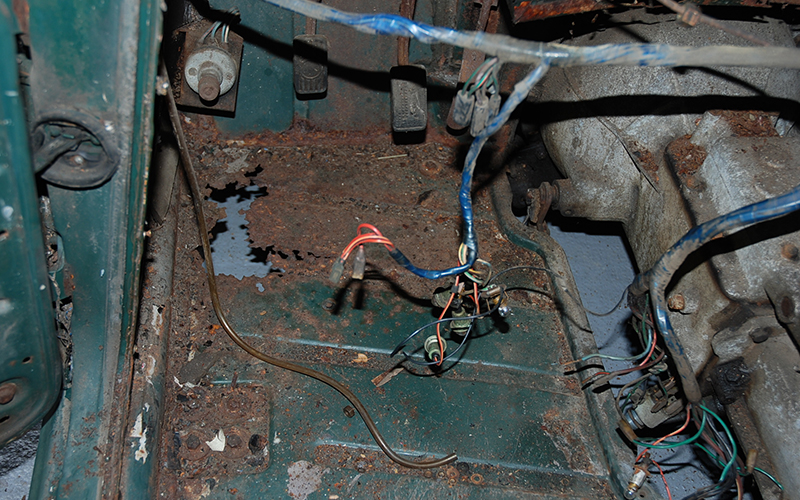
Going through the rest of the car, the only missing items are the seats, starter motor and transmission tunnel. Everything else is present although in desperate need to refurbishment. Sheet metalwork required included floors on both sides, inner and outer sills, boot floor and battery tray. Given that the car had been sitting exposed to the Californian elements for 37 years – not too bad! At this point I had to be positive otherwise I might be forced to concede that I was in over my head.
Credit: Photo by Bob Smyllie
Credit: Photo by Bob Smyllie
Let the breakdown commence!
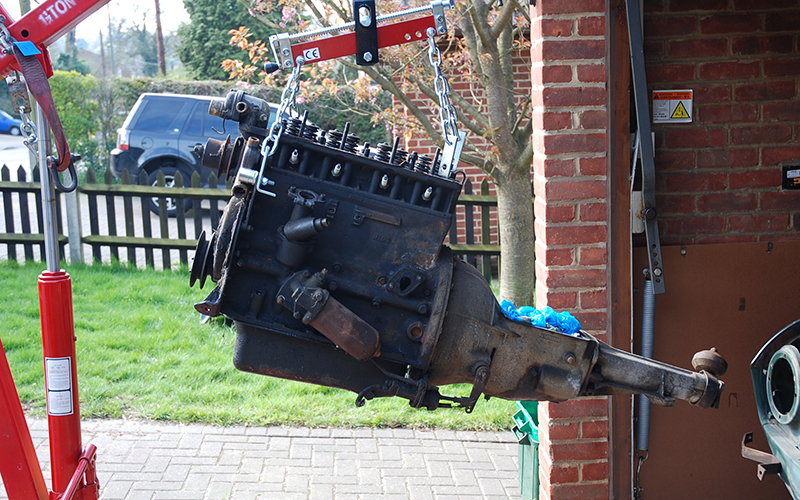
So, my first job was to dismantle the car and remove the engine and transmission. It is surprising how little time it actually takes to completely pull a car apart, especially when nature has been assisting for the past 37 years!
I had purchased plastic storage crates and recycled my plastic takeaway trays for several months. During the teardown nothing was thrown away, I kept everything even items that were completely unusable. Whilst I was meticulous in this regard, my filing system was not detailed enough, and I have lost count of how many hours/days I have spent looking for a ‘widget’ that I knew was in the garage or the shed somewhere.
Please remember to take lots of photos of everything before you pull it apart, I found this helpful for my ‘build album’ and photos really help you when figuring out how parts go back together.
Choosing the engineers and trades
As I mentioned earlier, I know my limits and some stages of the project would require expert help. Predominantly the Bottom End engine rebuild, gearbox rebuild, sheet metal work, chrome work and paint. I called and also went to see the firms I had shortlisted for the large jobs. I really enjoyed this as the classic trader community are a very friendly bunch and only too happy to discuss your project and give advice.
I consider myself to have been lucky, I have been absolutely delighted with the work completed by all of the principle engineering trades, in fact across the entire build there have only been a handful of disappointments in either the quality of work or parts.
Credit: Photo by Bob Smyllie
Preparing the body for metalwork and paint
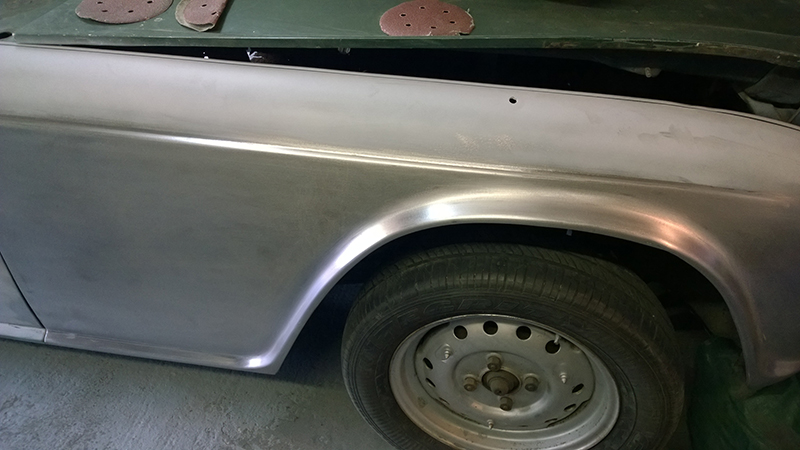
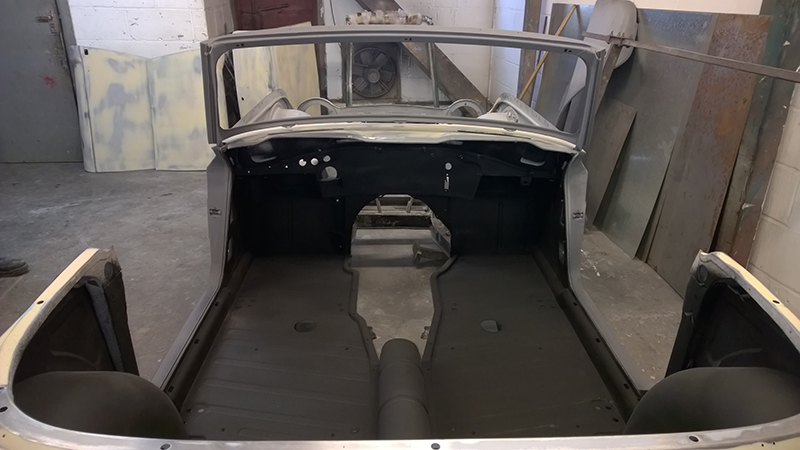
I had agreed with the Bodyshop that I would strip the car to its shell and take the paintwork back to bare metal. I elected to sand the bodywork which took 8 weeks of week-ends and evenings. It was messy and hard work, but in going through the process I really got a feel for the cars history and the work that had been done to the body over the years. The main body panels were all in pretty good shape, whilst difficult to be sure most of the panels looked original.
Credit: Photo by Bob Smyllie
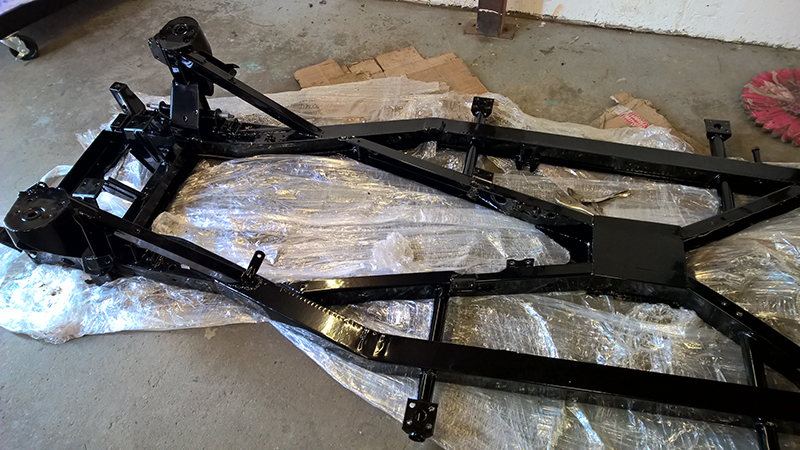
I purchased the required replacement panels at Heritage to ensure I had the best quality and fit available. New floors, boot floor, inner and outer sills and battery tray were shipped with the stripped shell to Adam at Chapel Restorations. They replaced the body panels before removing the body from the chassis which went off for blasting and finishing.
Credit: Photo by Bob Smyllie
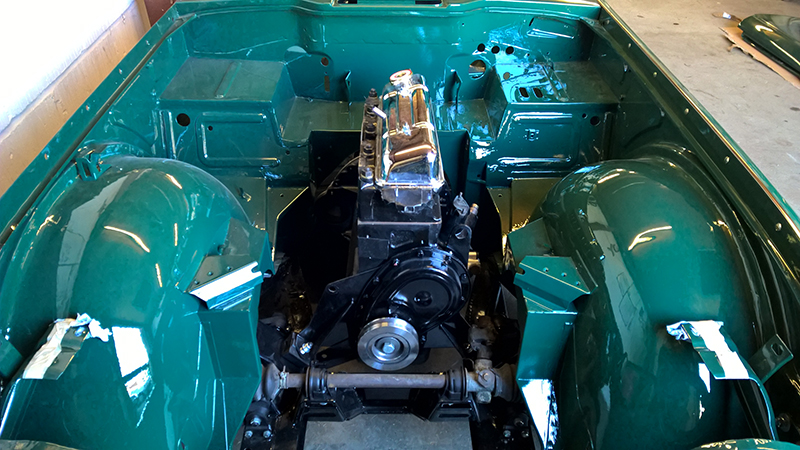
I had researched finishing options for the chassis and there seemed to be divided opinion, I eventually elected to powdercoat the chassis. While the chassis was away the body was final prepped for paint. Adam asked me to confirm what colour I wanted the car painted. After dithering over the entire catalogue of original Triumph colours I decided not to change the factory colour and the decision was made – Triumph Conifer Green. I am very pleased with the finished product.
Credit: Photo by Bob Smyllie
While the body was in paint, I went to Chapels workshop and hung the suspension and rolling gear onto the chassis. Once complete I bolted the rebuilt engine to the gearbox and transported it to the workshop where we fitted into the rolling chassis.
When the body came back from paint, it was lowered onto the rolling chasing and panel gaps adjusted until Adam was happy.
Then back onto a flatbed home for the final assembly.
To modernise or not to modernise – that is the question
So far most of the major components were the original items. Whilst I was keen to keep the car as ‘stock’ looking and factory as possible, I also wanted to ensure that the driving experience would be one of enjoyment. To me this meant reliable. I decided to make subtle improvements to the car that would either improve reliability or safety, accepting that whilst the car might be a nice example it would never be ‘concours’.
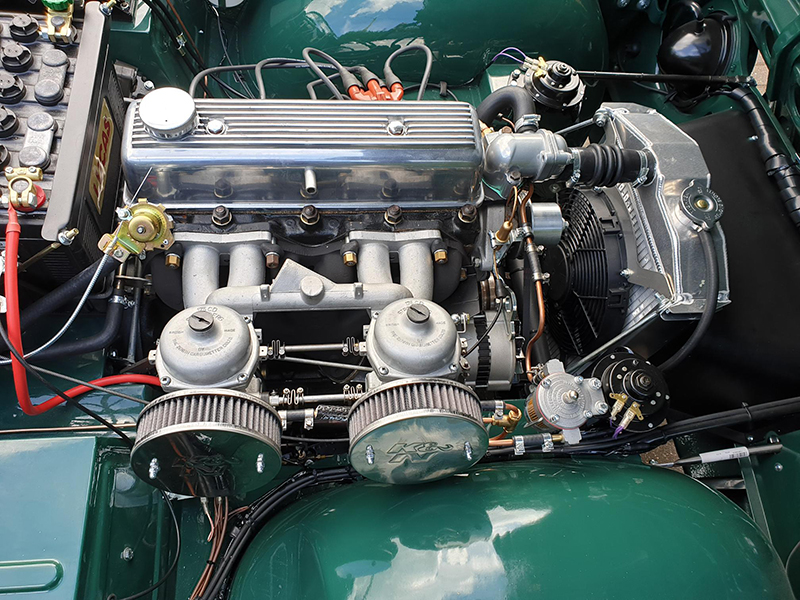
On the cooling system I fitted a modern efficient radiator, an electric cooling fan and upgraded water pump. The electrical and lighting system benefits from Halogen headlight bulbs with upgraded harness, an alternator conversion, a hi torque starter motor and concealed modern relays to control the fan and headlights. Finally, I upgraded to an electronic distributor.
On to final assembly
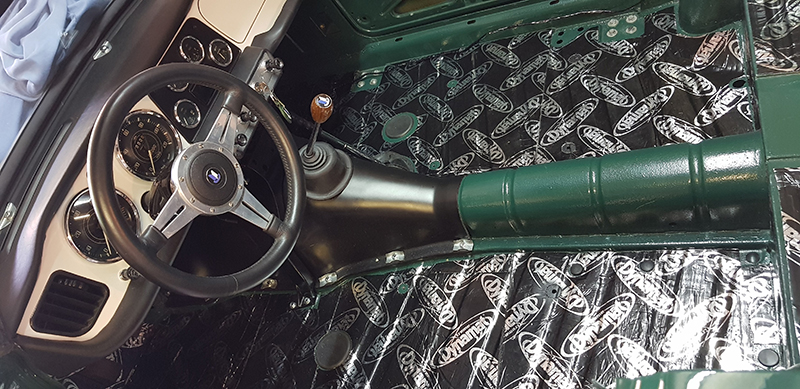
I started with the underside of the car fitting brake and fuel lines which was a slow but rewarding task. A person can get particular when it comes to neat pipework (ok maybe that’s just me). Fuel tank, handbrake system, prop shaft and other underfloor fitments followed. This stage took quite some time and frustratingly there was no tangible sign of progress (without sticking your head under the car).
Credit: Photo by Bob Smyllie
At last I moved topside, installing a replacement loom as the old one had suffered in the Californian sunshine. The Car came with the original dashboard which from the early photos appeared to be wood veneer, however when the car was initially delivered I realised it was in fact rust not wood! I blasted the metal dash and had it stove enamelled in the original white. All of the original gauges were sent to ‘Speedy cables’ (I don’t even know if they do cables) who did an amazing job restoring the gauge mechanisms, dials, glass and chrome rings.
Next, I reassembled and fitted the entire dash with new crash pads and dashtop, the original vents and heater hoses were washed in warm water and look fantastic. I kept a small 12V battery and multimeter on hand to test all circuits, switches and gauges during the electrical system assembly.
The heater/blower unit was dismantled, the heater matrix was cleaned, and pressure tested and I fitted a replacement fan motor before repainting the casing and reassembling. The remaining parts of the electrical system were also installed and tested (Ignition, lighting, wipers, horn, etc…).
Credit: Photo by Bob Smyllie
Final prep to fire the engine for the first time
At this point it made sense to fire the engine before any more progress was made on interior trim (just in case the engine needed to come out again). Attention turned to fitting all of the engine ancillaries all of which were original items refurbished. The only exception was the original air filters which were replaced by K&N items.
I had studied first time firing and break-in procedures at nauseam and had prepared a pre-flight check list that I went through several times.
On the big day I enlisted the help of an associate of the engine builders who would pop over to provide support and another pair of eyes and ears.
To my astonishment it fired and ran without too much coaxing, however it was only running on 2 cylinders which turned out to be a stuck float/needle on the front Stromberg which was quickly resolved. That day was an important milestone in the project, and I was both relieved and delighted that the beast was alive after all of this time.
Credit: Photo by Bob Smyllie
Home straight - Remaining assembly and MOT
Having proved that the engine ran, the priority switched to the outstanding assembly tasks. I have to say that my levels of enthusiasm and motivation had improved dramatically.
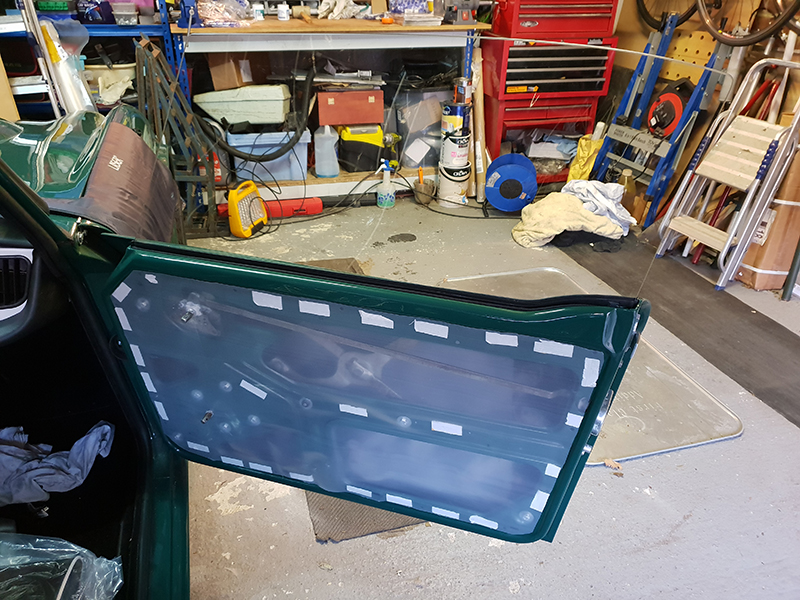
The remaining items were ticked off my list one by one, body fittings, door lock mechanisms, windows and winder mechanisms, interior trim, carpets and seats. On reflection the door contents (locks and windows) represented one of the lengthiest phases of assembly. I installed, adjusted and subsequently removed the entire door contents more times than I care to remember in my quest to get the door and window operation right.
At some point close to the end of the final assembly, I took a brave pill and drove the car on its first ‘shakedown’ run on public roads. There were a handful of snagging items that were rectified, and more test drives followed.
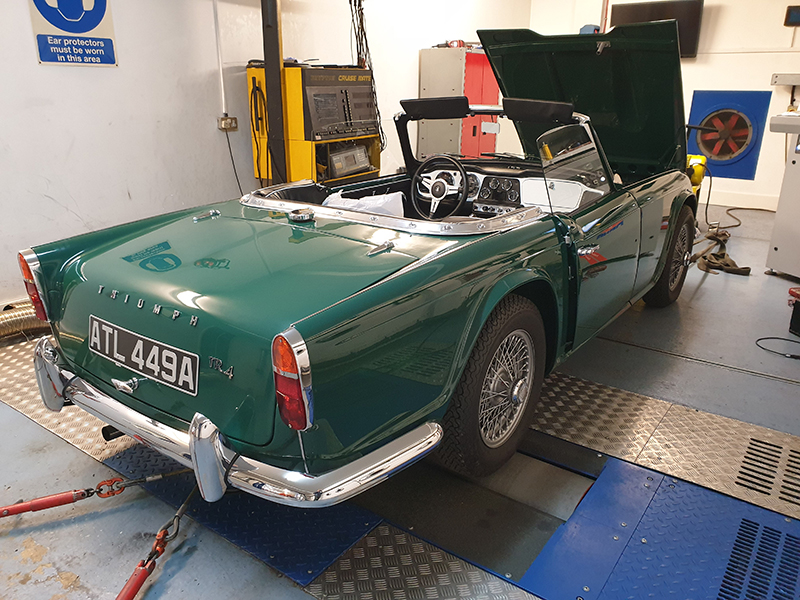
Legally, the car did not require an MOT, however in my mind I wanted an independent opinion on the safety of a car that had been stood for so long, completely disassembled and rebuilt by an amateur mechanic. So, I booked it in for a voluntary test.
The car caused quite a stir in the MOT bay as all the mechanics and customers crowded round the car. I must confess it was a proud moment! Anyway, the advisories were a faulty headlamp bulb and too much play in the nearside rear wheel bearing – very respectable given the scale or work.
Credit: Photo by Bob Smyllie
First outing
I completed the UK registration of the car and received an age-related registration. I had expected the process to be lengthy and complex, but it was completely painless. I was keen to ensure the basic setup of the car was safe for running-in and booked it in for an initial rolling road session with CCK Historic in Uckfield, once the engine is run-in, I will return for a final setup.
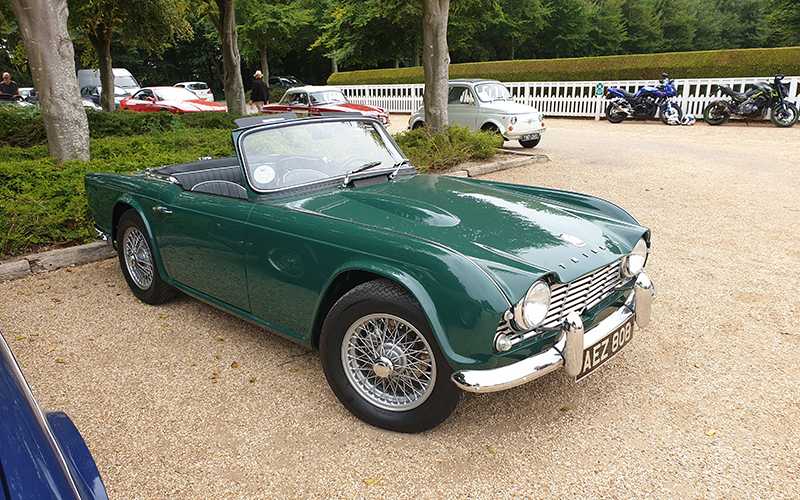
Our first outing this summer was Motors by the Moat at Leeds castle. We elected to exhibit on the Sunday and the weather was very kind to us. The drive was nerve racking and to be honest I did not enjoy it as I was totally focussed on how the car was running, any unexpected knocks, noises and rattles - had anything fallen off?.
The day was really enjoyable. We received some great comments about the car which was very rewarding on its first showing. I was very pleased that the car made the 80-mile round trip without a hitch!
Credit: Photo by Bob Smyllie
Other events we have attended this summer are the London 2 Brighton classic car run, Goodwood Revival and Breakfast club, and a local show at Highams Farm.
The car now has 760 miles on the clock and has not let me down and I am delighted with how the project has concluded. I say concluded but as any classic owner will know, there is always something to be done!
And finally,
This is the first time I have completed a challenge like this, if you are still with me at this point then I hope you have found my story interesting and helpful.
The overall experience for me has been very positive and I can honestly say that I have enjoyed it from start to finish. I have learned so much (even at my age) about problem solving, I discovered that when things are not going well it is sometimes best to stop, step away, think the problem through and have another go.
The hardest part (at times) was perseverance. During the 5.5 years of the project, life has been busy and it would have been easy to lose hope and give up. I found that during those periods all it needed was an hour (sometimes less) in the garage to regain enthusiasm.
I did keep every single invoice and receipt which I have included in a build file along with hundreds of photos. Dull as ditchwater to most but they remind me of what I have achieved which puts a smile on my face and may be of interest to the next guardian of the car. Everyone asks the ‘how much did you spend’ question. I have never added up those invoices and have no intention of doing so!
I have finally disposed of all of the parts that were replaced, other than original equipment that I have modernised such as the dynamo, starter motor, original air filters and such.
I plan to prepare the car for hibernation this winter and really looking forward to enjoying it next year.
So, my advice to anyone who is considering a restoration is don’t over think it. There is no logical reason why anyone would take on a rust bucket and as for the financial justification – it is flimsy at best. What I can say is that I have met some fantastic people along the way and most of all I have that huge sense of achievement. If I could turn the clock back, I would do it again...
Our TR2-4A Parts & Accessories pages list the most comprehensive range of spares for your classic car.

Keep up with all the latest from Moss on our social pages
|
|




 Loading...